
What Tools Do You Need to Repair a Broken Openable Shaker Standee
2026-07-30
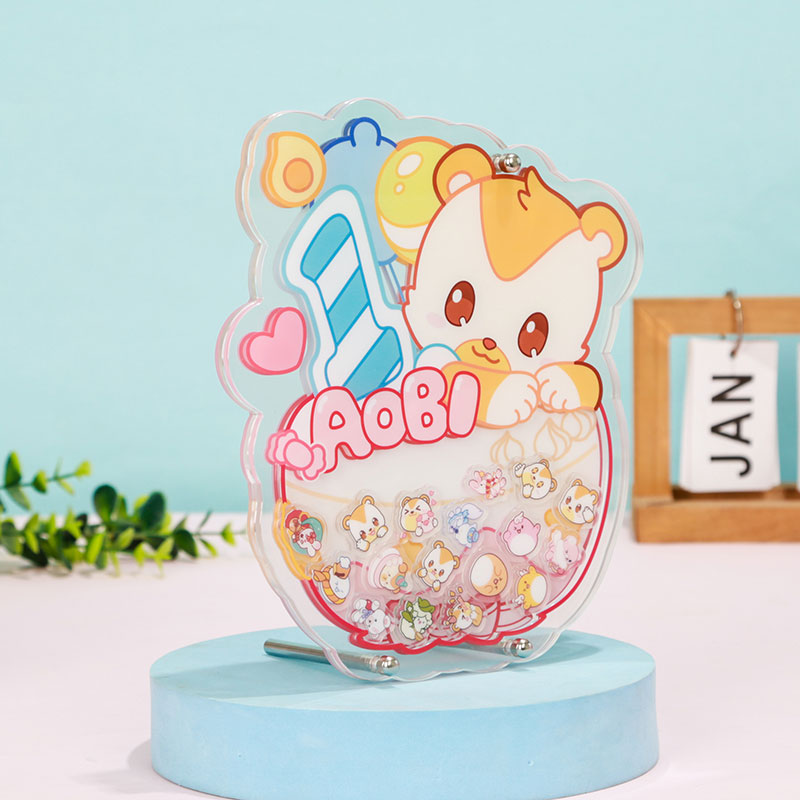
Collectible enthusiasts often face a heart-sinking moment when their cherished Openable Shaker Standees develop a crack, loose seal, or cloudy liquid layer. While these interactive pieces are designed for durability, accidents happen. The good news is that repairing a broken Openable Shaker Standee is entirely achievable with the right toolkit and techniques. At Kaloge, we have spent years refining repair protocols for collectors worldwide, and this guide walks you through every essential tool you need, step by step.
Why Specialized Tools Matter
Unlike static acrylic displays, Openable Shaker Standees contain moving parts, liquid fill, glitter, and semi-permeable seals. Using incorrect tools can scratch the surface, introduce moisture, or permanently damage the internal floating elements. Professional repair demands precision, cleanliness, and material-specific implements. Below is the definitive tool list categorised by function.
Core Tool Kit for Shaker Standee Repair
| Tool Category | Specific Item | Purpose |
|---|---|---|
| Opening Tools | Ultrasonic knife or thin craft spatula | Separating welded acrylic layers without chipping |
| Sealing Tools | Variable-temperature heat gun (with diffuser) | Reactivating original adhesive or curing new sealant |
| Liquid Management | Syringe kit (3ml–10ml) with blunt needles | Draining cloudy fluid and injecting replacement solution |
| Cleaning Supplies | Microfiber cloths + 99% isopropyl alcohol | Removing residue without scratching transparency |
| Refill Materials | Distilled water + propylene glycol (60:40 mix) | Preventing bacterial growth and slowing glitter沉降 |
| Adhesive System | UV-curable optical glue (low-viscosity) | Bonding acrylic edges with crystal-clear results |
| Finishing Tools | Polishing compound + felt buffing wheel | Restoring optical clarity to sealed edges |
Step-by-Step Tool Application Process
1. Diagnosis and Preparation
Place your Openable Shaker Standee on a lint-free mat. Inspect the failure point—edge separation, corner crack, or top-seal leak. Kaloge recommends photographing the internal layout before opening, as floating pieces shift during handling. Prepare a clean workspace with anti-static spray to repel dust.
2. Opening the Unit
Heat the seam evenly with the heat gun at 150°C for 8–10 seconds. Insert the craft spatula gently along the softened edge. Work in 1cm increments, never prying more than 2mm depth per pass. This preserves the alignment pins that Openable Shaker Standees rely on for reassembly.
3. Fluid Extraction and Replacement
Use the syringe with a blunt needle to withdraw old liquid from the bottom corner. Flush the cavity twice with isopropyl alcohol, then air-dry for 15 minutes. Refill with the distilled water–propylene glycol mixture, leaving a 5% air gap to allow for thermal expansion. Kaloge testing shows this ratio extends fluid clarity by over 18 months compared to plain water.
4. Resealing with UV Glue
Apply a continuous 1.5mm bead of UV optical glue along the entire perimeter. Clamp the edges lightly using spring-loaded clips. Cure under a 365nm UV lamp for 90 seconds per side. This adhesive type is preferred by Kaloge because it remains flexible enough to absorb minor impacts while maintaining full transparency.
5. Polishing and Final Inspection
Buff the sealed edge with felt wheel and fine compound. Wipe down both faces with a fresh microfiber cloth. Rotate the repaired Openable Shaker Standee in all directions to confirm even glitter flow and zero air bubbles.
Common Pitfalls and How to Avoid Them
| Mistake | Consequence | Corrective Tool |
|---|---|---|
| Using standard superglue | Permanent white fogging on acrylic | UV optical glue only |
| Overheating the seam | Warped outer frame | Heat gun with digital temperature control |
| Skipping the air gap | Pressure cracks during temperature changes | Syringe with measurement markings |
| Polishing dry | Micro-scratches that diffuse light | Felt wheel + liquid compound |
Frequently Asked Questions About Openable Shaker Standees Repair
Q1: Can I repair a cracked front panel on my Openable Shaker Standee without replacing the entire unit?
A: Yes, but only if the crack does not cross the central viewing area. For hairline edge cracks, Kaloge recommends applying UV optical glue from the inside using a fine-tip syringe, then clamping the crack under moderate pressure for 2 minutes before curing. For cracks longer than 2cm or those that spider-webbing inward, full panel replacement is safer because structural integrity affects the shaker motion. Always test the repair by gently tapping the panel—a dull sound indicates incomplete bonding, requiring reapplication.
Q2: How do I prevent cloudiness from returning after I refill my Openable Shaker Standee?
A: Cloudiness stems from three sources: microbial growth, plasticizer leaching, or incompatible fluid mixing. To permanently resolve this, Kaloge advises using only distilled water combined with food-grade propylene glycol (not glycerin, which attracts mould). Before refilling, rinse the interior twice with 99% isopropyl alcohol and allow it to evaporate completely—any residual moisture dilutes the preservative effect. Additionally, replace the internal O-ring if your model has one; aged rubber releases oils that fog liquid within weeks. With proper prep, cloudiness should not recur for 12–18 months under normal room-temperature storage.
Q3: What should I do if the floating decorations inside my Openable Shaker Standee no longer move freely after repair?
A: This typically indicates excess adhesive residue or a misaligned inner chamber. First, rotate the unit slowly—if pieces stick at specific angles, use a long-tipped probe (or a straightened paper clip with a bent end) to gently dislodge trapped debris through the fill hole before final sealing. If the issue persists after resealing, Kaloge suggests reopening the unit and checking the chamber dividers; warped dividers create friction points. Sand any rough edges with 2000-grit wet/dry paper, rinse thoroughly, and refill with a slightly higher liquid-to-air ratio (reduce air gap from 5% to 3%) to improve buoyancy.
When to Seek Professional Help
While the tools above cover 85% of common failures, some situations demand expert intervention—deep corner fractures, detached internal murals, or broken activation springs. Kaloge offers a mail-in assessment service with a 48-hour diagnostic report. Our workshop uses industrial-grade sonic welders and optical-grade acrylic sourced specifically for Openable Shaker Standees, ensuring repairs that outlast factory seals.
Final Tool Checklist Before You Start
-
□
Ultrasonic knife or craft spatula
-
□
Digital heat gun with narrow nozzle
-
□
Syringe set (3ml, 5ml, 10ml) with blunt tips
-
□
99% isopropyl alcohol + lint-free wipes
-
□
UV optical glue + 365nm curing lamp
-
□
Spring-loaded edge clamps (4 pieces)
-
□
Fine polishing compound + felt buffing wheel
-
□
Distilled water and propylene glycol
Ready to Restore Your Collectible?
A well-executed repair can give your Openable Shaker Standee a second life that rivals its original condition. With the correct tools and patient technique, even novices achieve professional-grade results. However, if you feel uncertain at any step—or simply prefer a guaranteed outcome—our team at Kaloge is here to help.
Contact us today through our website’s repair intake form, or email our support line directly. We offer free preliminary assessments with photos, transparent pricing, and a 6-month warranty on all repair work. Let Kaloge bring the sparkle back to your Openable Shaker Standees—because every piece deserves to shine again.